Bottom Hull Paint
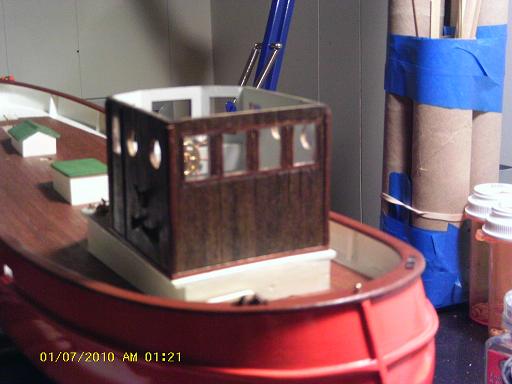
This session is split up in sections, due to the fact that I had to wait for steps to dry. it started out as it always does, just puttering around with small stuff. I painted the exhaust funnel and did a little more to the pilot house. I was going to wait till the roof was cemented in place to do the edge moldings, but decided on doing the uprights for now. they were later stained, in order to make them a little darker and match the exterior walls. I have to get the portholes done {fitted with glass}, to complete the pilot house and close it up.


You may notice that the way the double blocks are fastened to the platform. I had made a change here, removing the thread that I had tied them with, to making the eye bolt couplings with craft's wire. I had a package of different colored wire, but never gave much of a thought to try to see if it would work. it works like a charm, very bendable and strong enough to do the job I need it to do. the bottom paint was the next thing to focus on; this needs to come to completion, before any of the deck work can be done......I don't like the idea of having to mask the hull / deck with the structures on it {very bulky}. after it was masked for painting, down it went......to the cellar! the new airbrush set-up worked very well. it was nice to be able to see and regulate the air pressure. with the dark drab, it only took one coat, and about five minutes at the most to paint. this is a flat paint.

After I knew it was dry {it only took a few hours}, I couldn't wait to get the prop and rudder in place.
I only had to do a couple minor touch ups to clean it up. I installed the anchor pulley in the bracket on the starboard side of the hull.
I'm looking forward to the day when I can work topside and not have to be concerned with flipping her over. the bottom paint is well on it's way to being complete. there is one more thing that needs to be done, in order to put the closure on the hull paint.